

Gone are the days when hungry folks would drive down the street looking for a new restaurant to explore. People nowadays use the internet, mainly Google, to help them find the ideal restaurant.
In this piece, we’ll focus on how to add a Menu on Google My Business page, a tool that every restaurant should be using to effectively market their business online and enhance profitability.
Did you know other than the basic features on GMB, you can also add a link to your menu and list menu items on your GMB profile?
Adding a menu to your Google My Business profile only takes less than 10 minutes!
What is Google My Business?
Google My Business (GMB) is a free and simple tool that allows you to market your business online on Google. GMB allows you to create a Business Profile for your restaurant, which helps potential customers to find you on Google Search and Maps.
We’ve written an article on how to setup a GMB account and you may find it here:
Google My Business Guide For Cafes And Restaurants
Steps to Add a Menu on Your Google My Business Page
Here’s how to do that:
If you are new to Google My Business, you’ll need to create and claim your account. Once you have access to your page, you’re ready to get started.
Step 1: Log in to your restaurant’s account on the Google My Business page.
Step 2: Click the “Info” button on the left-hand side of the page. This will bring up a panel with editable fields.
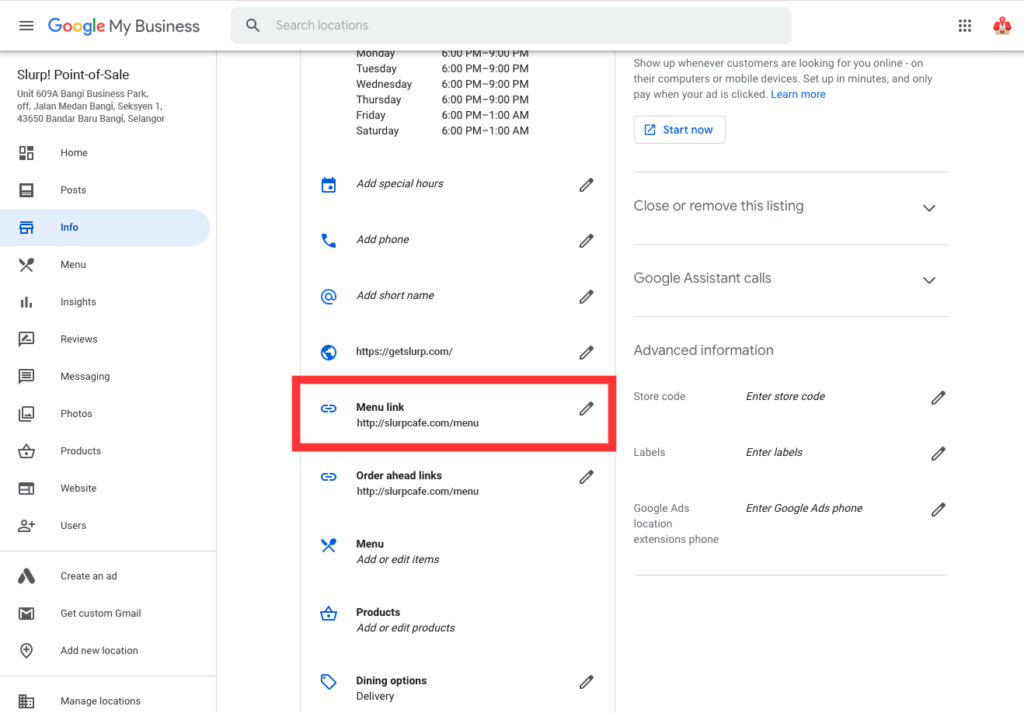
Step 3: You’ll see a space called “Menu link” where you can link to your restaurant’s online menu. It is advisable to include the URL because it is an excellent inbound marketing strategy for attracting customers to your business.
Step 4: Next, in your GMB page, we’ll add specific menu items. You may get to it either by clicking the “Menu” button in the same panel where you inserted your menu URL or by clicking the “Menu” button on the left-hand side of the page.

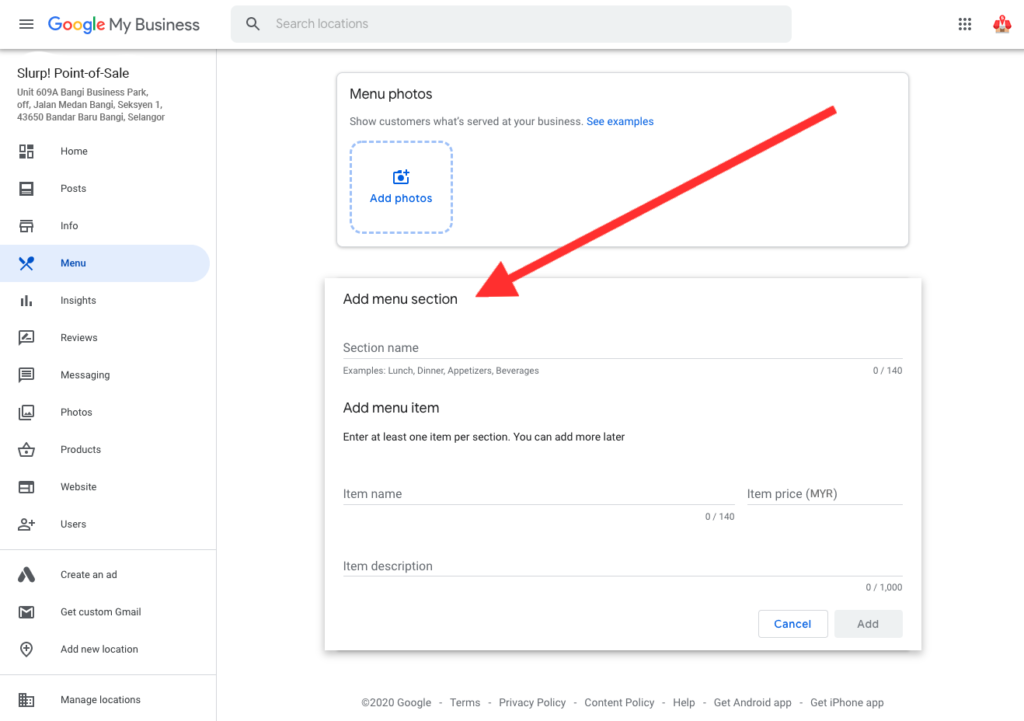
Step 5: Once you’re in the “Menu” section, you’ll see the option to “Add menu Section.” This is where you may organize your menu items into sections like appetizers, combos, dinner, favorites, and so on. Include as many sections as you require.
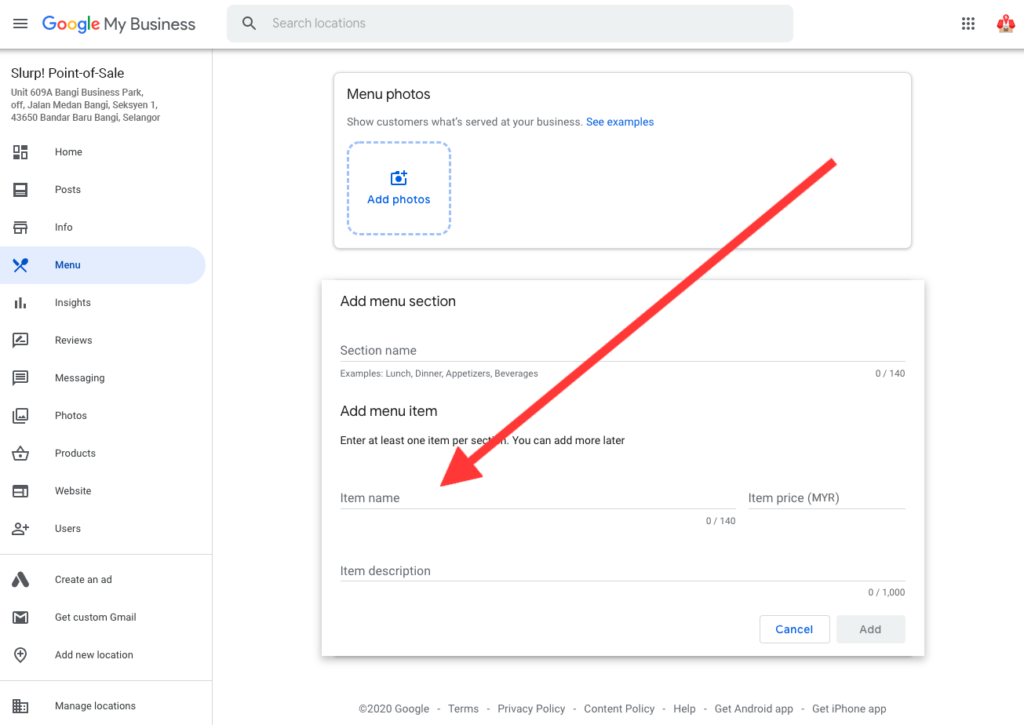
Step 6: After you’ve completed the sections of your menu, you can then start adding individual items to it. Another benefit of GMB is the ability to submit item names, descriptions, and images in order to attract interested customers.
That’s it and you’re done!
Wasn’t that simple?
Hope you found this brief step-by-step tutorial on how to add your menu to your GMB profile useful.
Share your GMB profile on social media by tagging us for a chance to be featured on Slurp!’s social media.
All the best!